I have always wanted to build a boat - so when a colleague suggested we team up and build one together I was very keen. We both have small children and limited time, so we needed something that would be fast and easy to build. It also needed to be car-toppable, fit two adults (in a pinch) and fun. After some research, we settled on the “hot rat” design by Gavin Atkins, which he has very generously made available freely online.
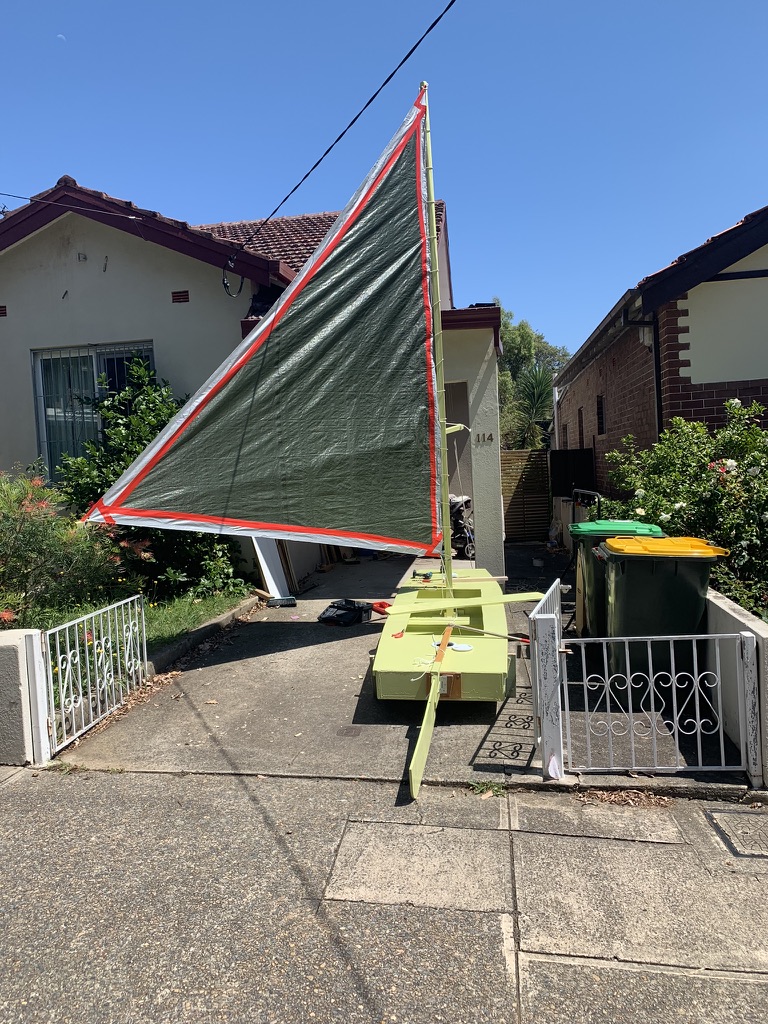
The design is essentially a curved plywood box, with a leeboard, rudder and mast. The leeboard is like a centerboard - it stops the boat drifting sideways - but instead of being in the center of the boat it is on one side. This boat has only one, so sometimes it’s to leeward and sometimes to windward.
Making the hull
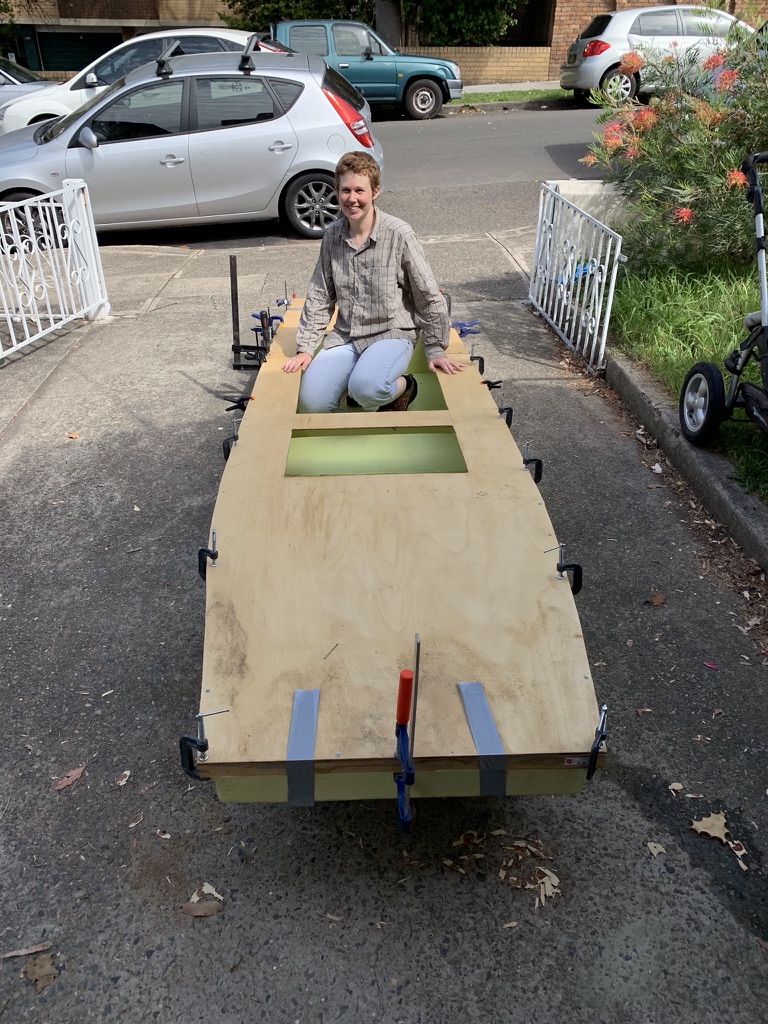
The first step was to mark out the sides, bottom and supporting cross-sectional frames of the boat onto 2400x1200 plywood. We used 6mm marine ply from Bunnings as it was cheap and readily available. The most challenging part of this was making sure we didn’t mess up when working inches. Next came a lot of hard work with the handsaw (a jigsaw would have been great for this part). The boat is longer than a sheet of plywood, so we joined the panels by butting them together and epoxying another piece of plywood over the join. The cross sectional frames were re-enforced with 42x19mm dressed pine around the sides. Then we we zip-tied all the pieces together and glued them with an epoxy filet along the inside of the joins. The joins were then supported with 50mm glass-fiber tape & epoxy on both the inside and outside of the seam. We used some more dressed pine as gunnels along the top edge of the hull. This served both to stiffen it and gave us something to attach the deck onto. With the gunnels in place, we flipped the boat over and traced around it to mark out the deck. With the deck glued on (so many clamps) we had something definitely boat-like!
Leeboard, rudder and mast
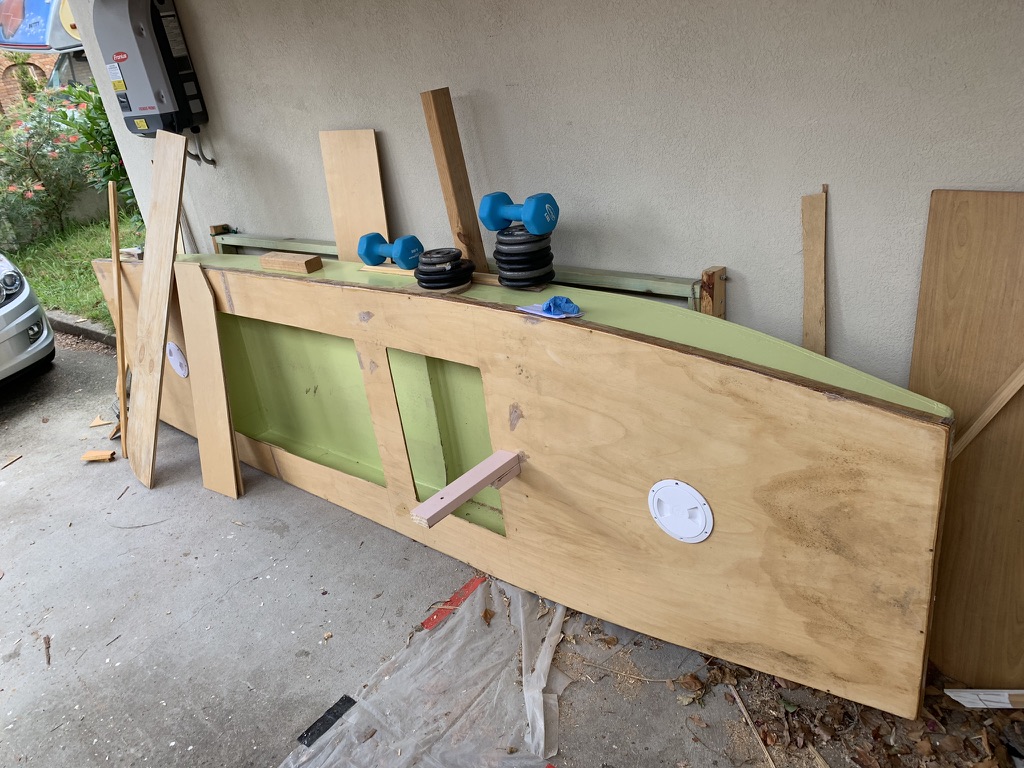
The leeboard and rudder are made from the same plywood, just two pieces epoxied together for extra thickness and strength. The are subject to significant stain while sailing, so the double thickness is definitely required. We followed the plan for both, except that we skipped cutting a slit into the leeboard. We used some left over plywood and some more of the 42x19mm pine to reinforce the side of the hull where the leeboard would attach and make a strip along the bottom of the hull for it to rub against when down. We also cut holes in the for and aft buoyancy chambers to add inspection ports. We couldn’t find any really affordable mast options, so we decided to glue two pieces of treated pine together. We used some scrap pieces to get the mast step the right size.
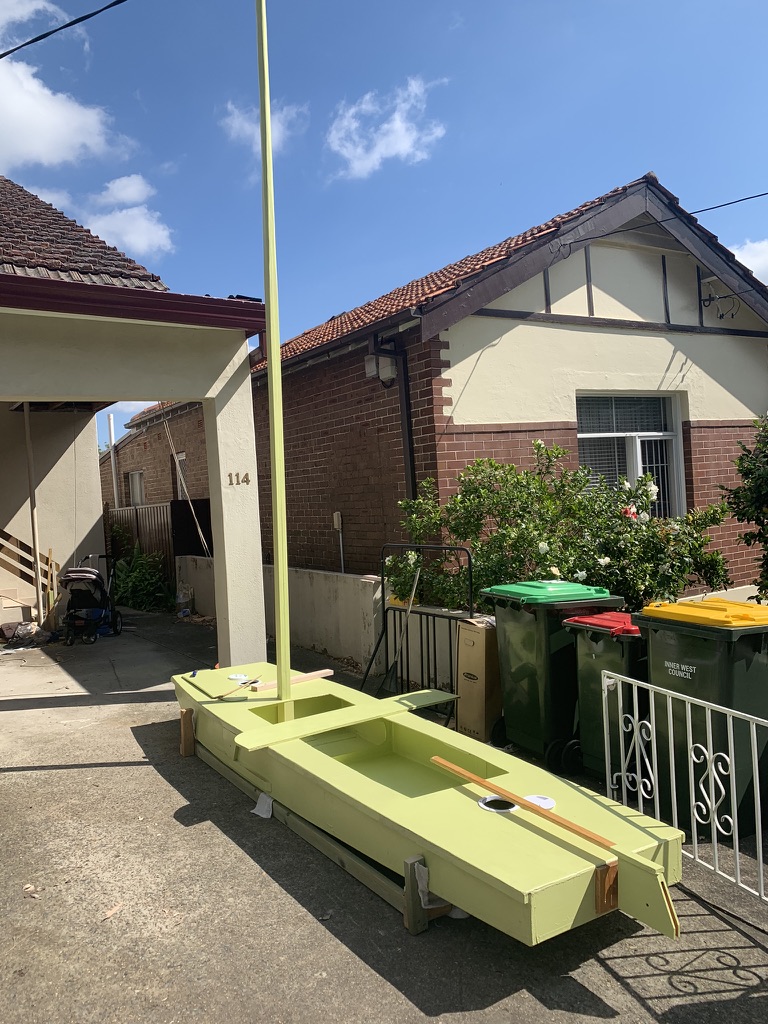
We planed/rasped the top section of the mast down until we were sick of it and then painted everything in a nice green, (discount, miss-tinted) house paint. We made the rudder box with plywood and the tiller with some more dressed pine (this turned out not to be strong enough and snapped on around the 3rd sail). The rudder was attached to the boat with a gate-hinge. This proved the weakest point of the boat. If I was doing it again I’d spring for proper gudgeons and pintles.
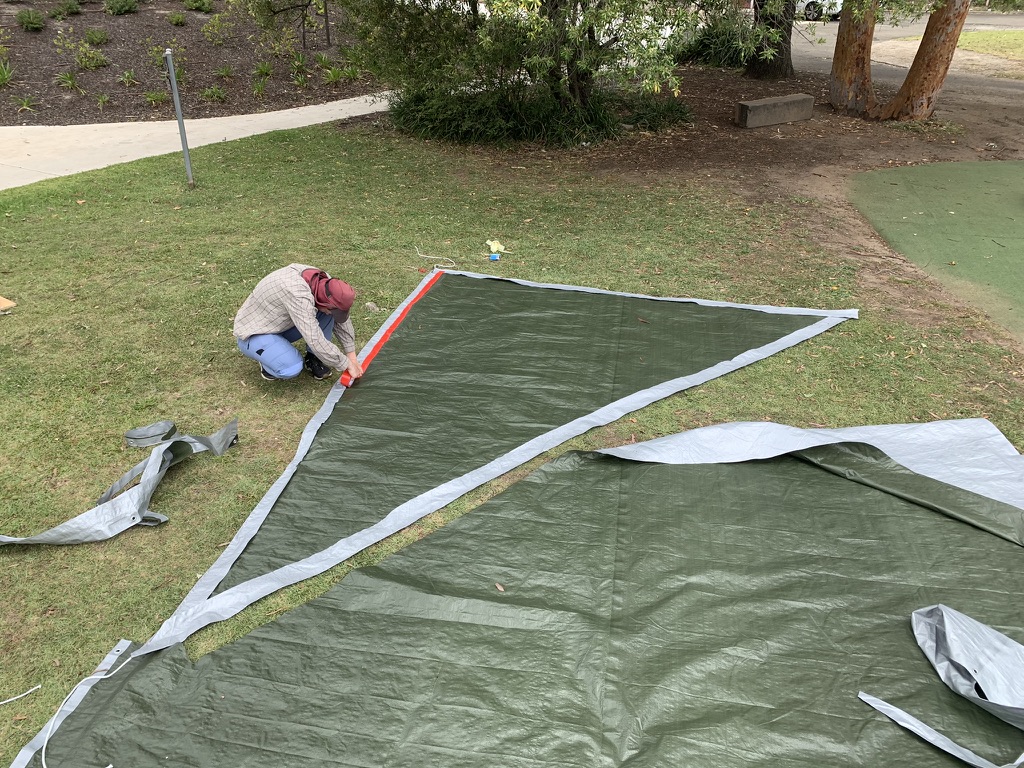
Next up off to the local park for some sail-making. The sail is a hardware store polytarp joined together with double-sided tape and duct tape (no sewing). The curvature of the sail is cleverly introduced without any panels by putting a curve along the luff and the leach when cutting it (we just followed the plan).
We then hammered in a bunch of brass eyelets and laced the sail to the mast. Instead of a boom, this design has a sprit. This removes the need for a complex fitting to connect it to the mast and means we get away with just one rope (the snotter) to control the shape of the sail. It also has the advantage that there is nothing hard to hit you in head up the front of the boat - which the kids loved.
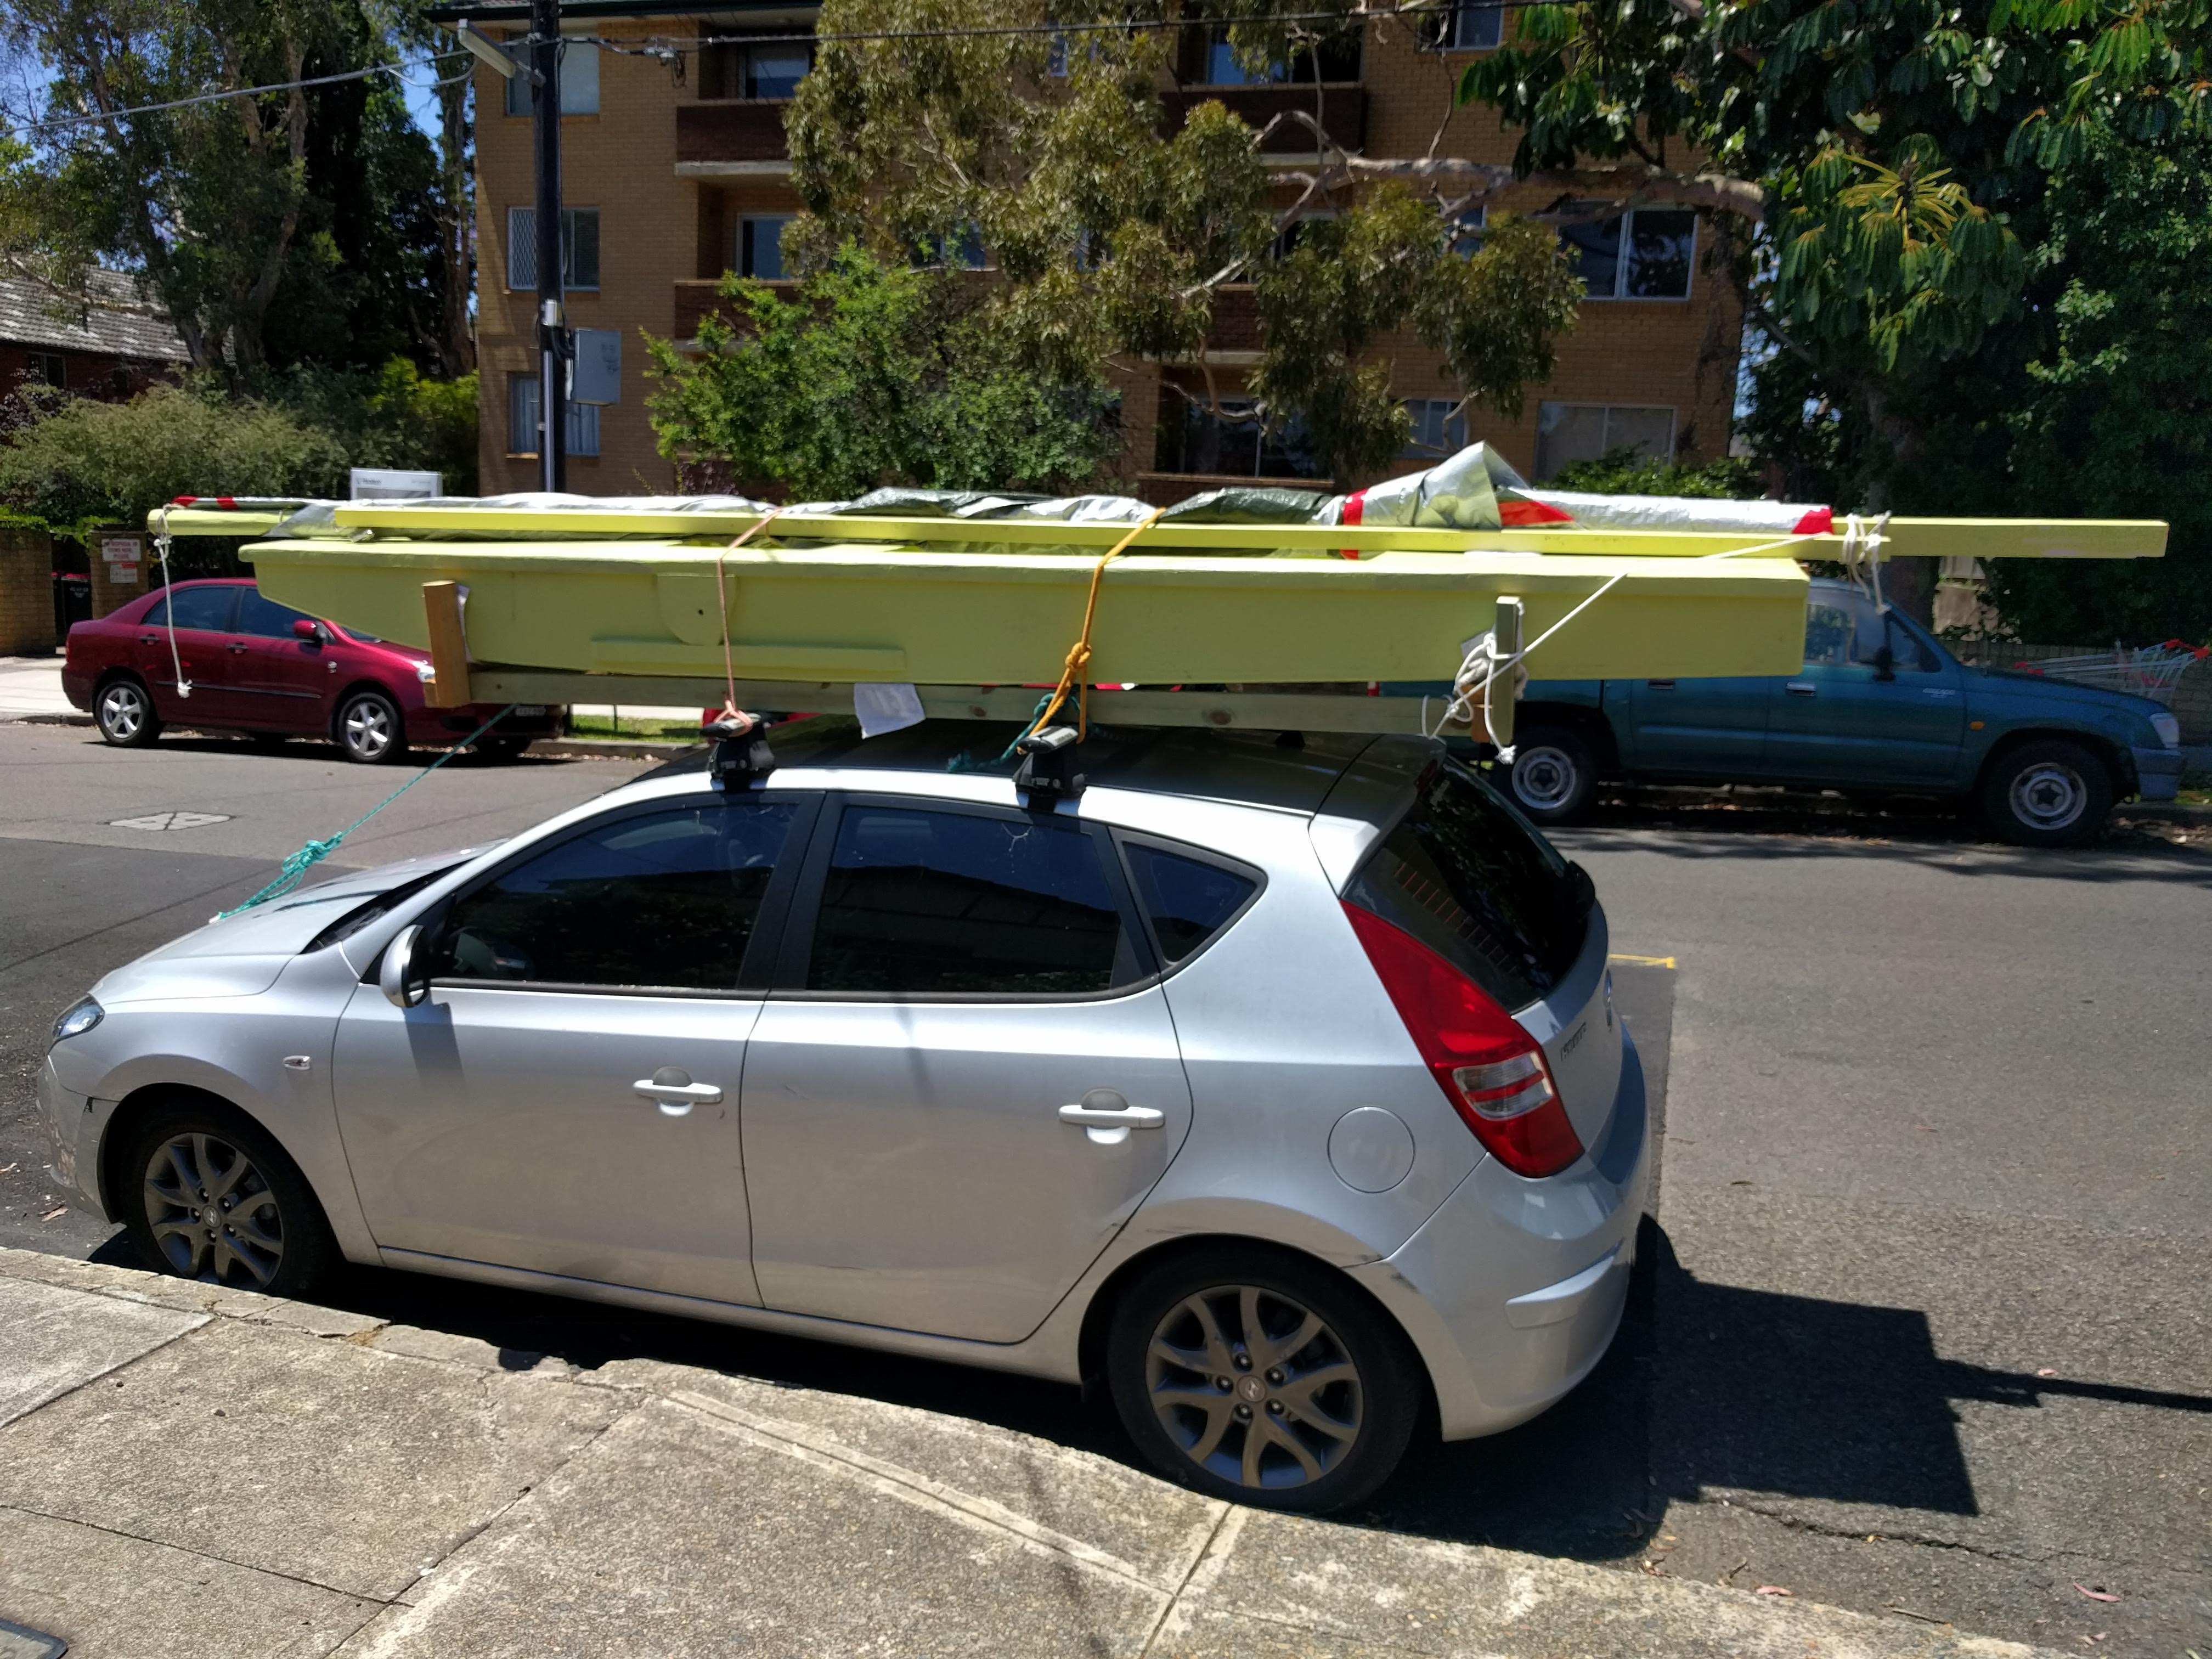
It fits on the car!
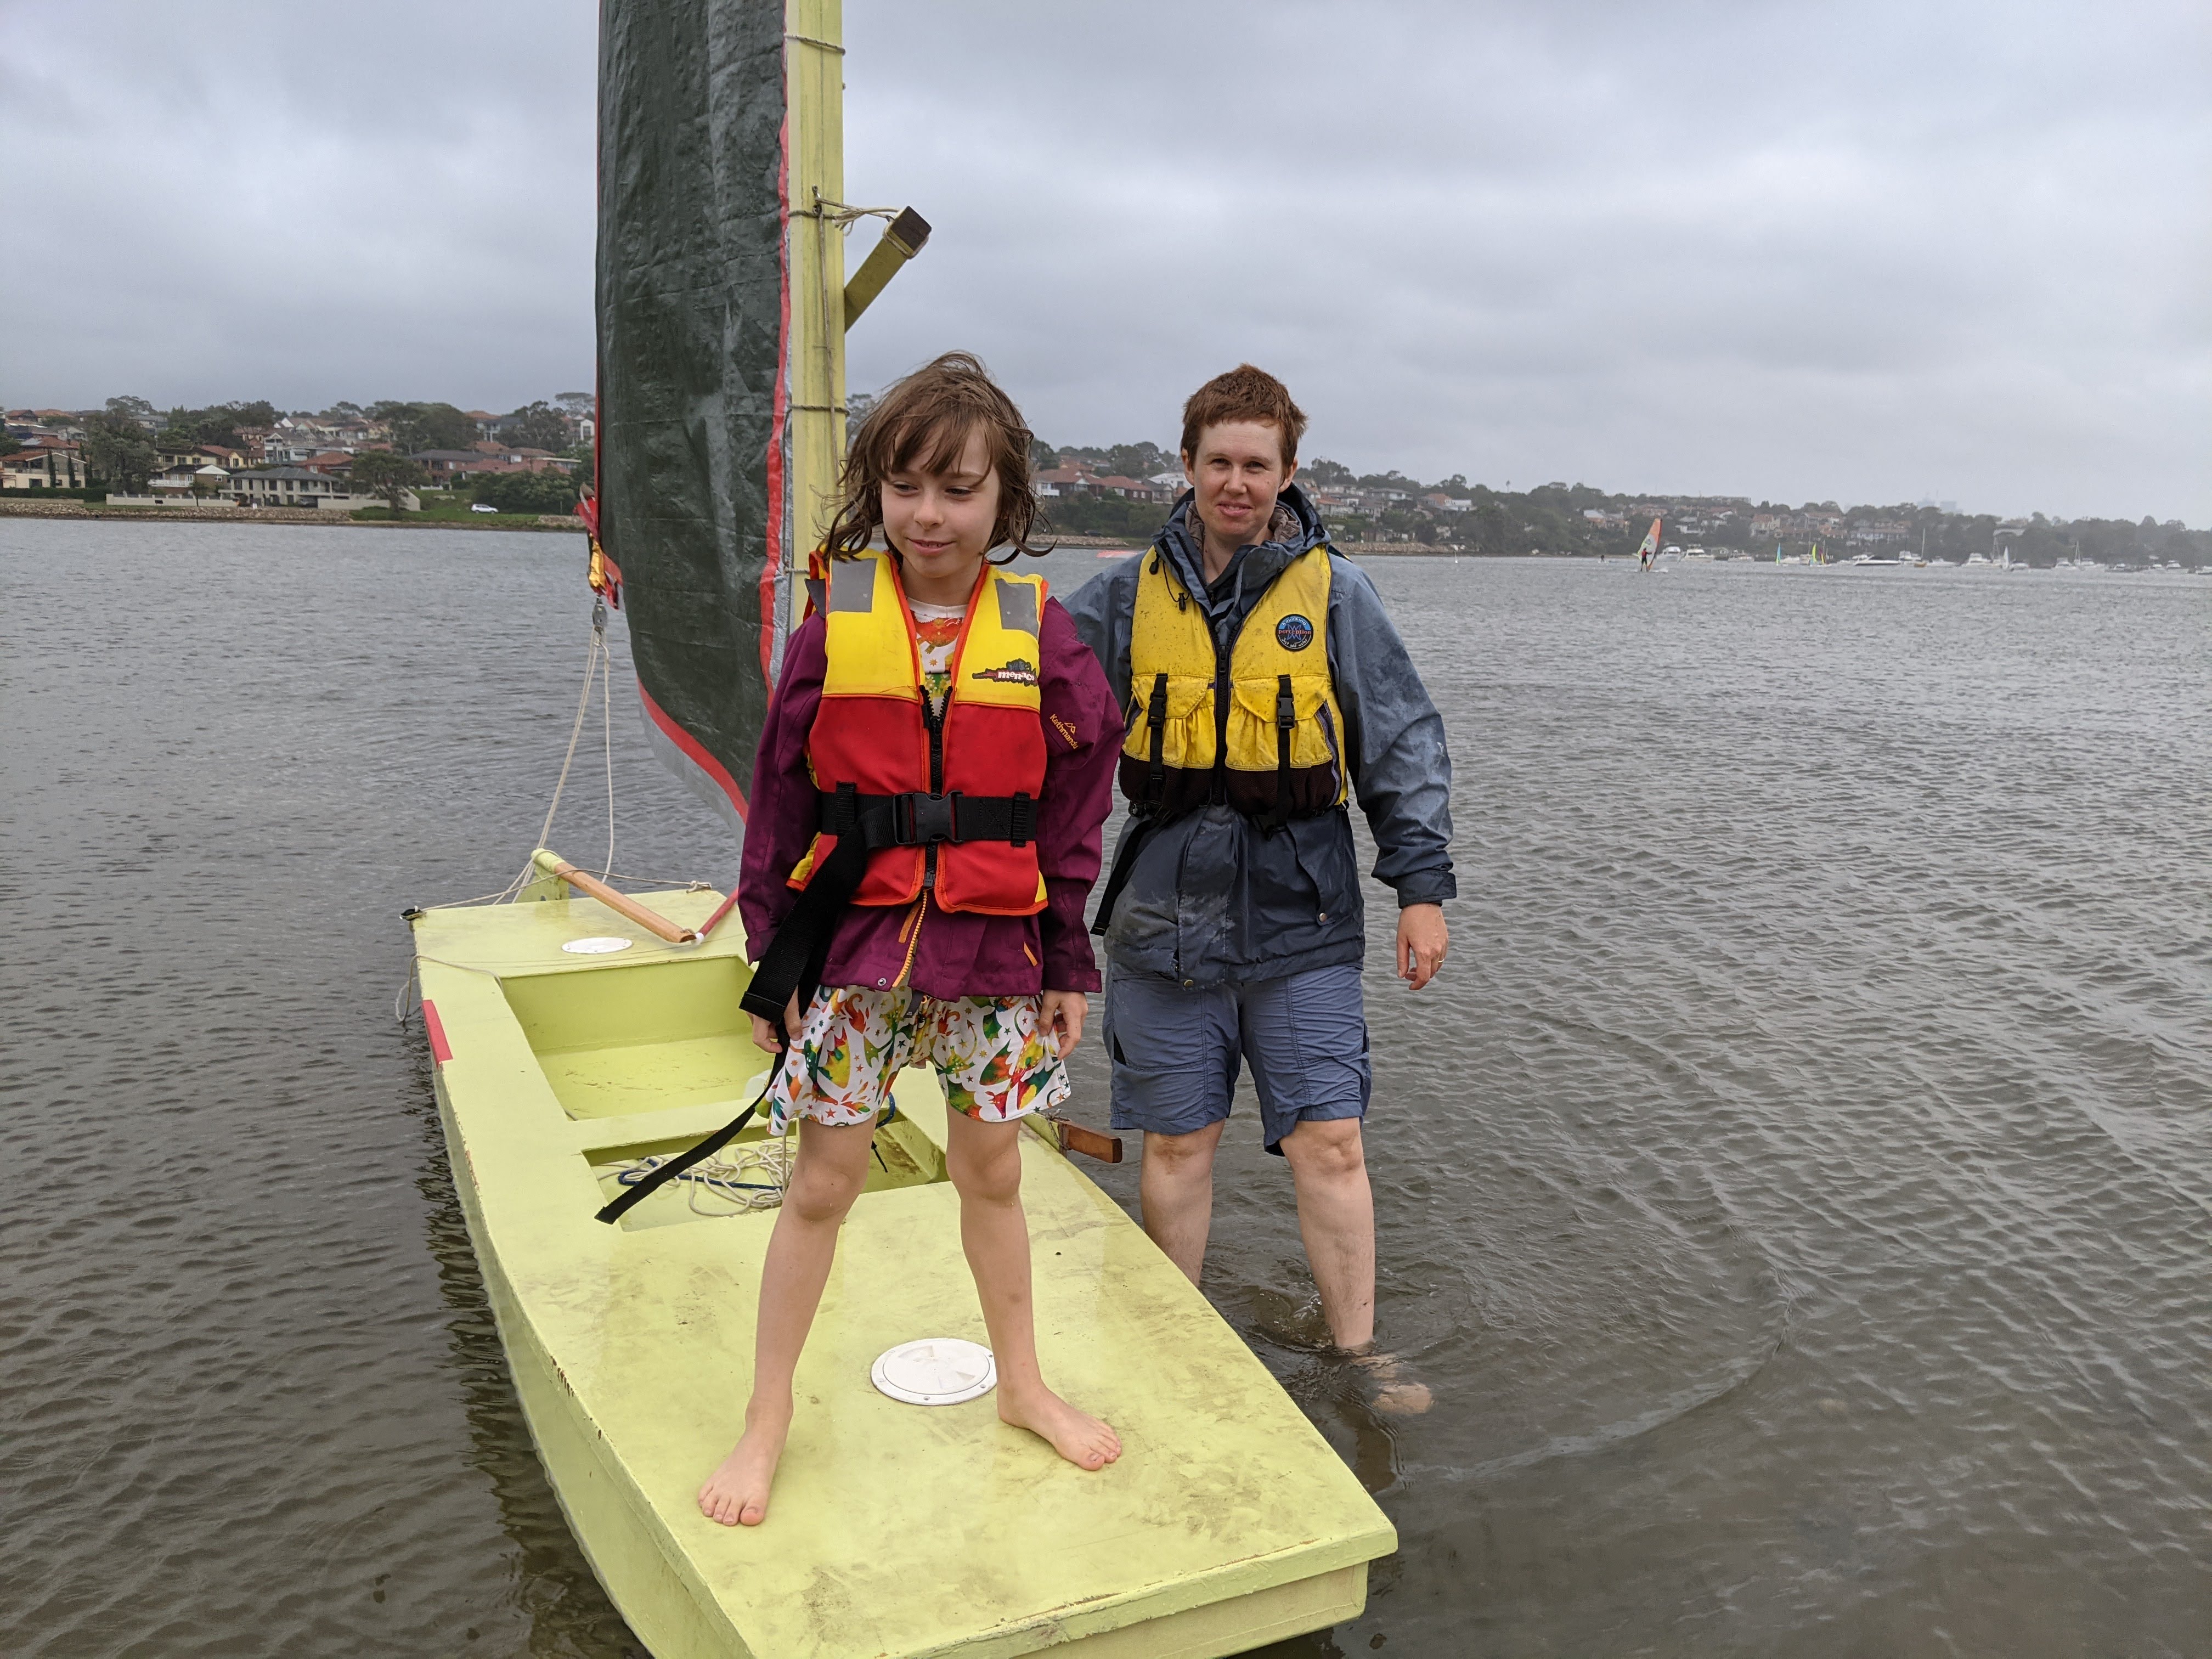
And delivered all the fun we had hoped for!
Learnings for next time
Building the boat was a lot of fun. I’m glad we chose a design requiring relatively few actual hours of work to get on the water. It took us around 3 months all up with us spending 3-4 hours every second weekend working on it. Having a boat that came together so quickly meant it was done ready for the summer sailing season without a lot stress.
The result was something that was light enough for two of us to lift off the car and a lot of fun to sail, alone or with the kids. It’s pretty quick - I was keeping pace with the laser radials out racing, easy to pull up after a capsize and not too scary for the kids (the little hole in the deck up front is a perfect spot for them to sit and they never have to worry about ducking in a tack or a gybe).
The first few sessions the rudder/tiller assembly broke repeatedly (tiller snapped, screws ripped out, bolts ripped out, hinge bent). Next time I would buy proper hardware for that. With two adults on the boat, there was some cracking of the side decks off the gunnels. I re-glued those spots, added some extra stainless screws and added four simple brackets to help support the deck. This seem to fix the problem. We started out with a gate bolt to secure the leeboard but found it quite difficult to hold it still and push the bolt in place while sailing. We also found it was helpful to have a bit more control over the angle of the leeboard to balance the boat for the wind strength. So we attached a handle to the top of the board to help pull it down and led a rope from the handle back to a cleat to lock it in place. In strong winds when on a tack with the leeboard to windward, you can see it bending away from the boat somewhat alarmingly, but it still performs reasonably well.
All up a great little boat :-)
Some alternative names were discussed, but as the kids did not reach an agreement early, the boat inevitably became known simply as “The Green Boat”